
How to Make Cider

Apple cider is an incredibly easy to make fermented beverage. We've made a bunch of different versions from different sources of fruit. Everything from store bought to freshly pressed local cider. We've compiled instructions on how you can make your very own hard cider at home. We have instructions for both sparkling and still cider.
A quick note on sterilization. It is VERY important to employ sanitizing agents in every step of cider production. A months’ worth of work can be wiped out by not properly sanitizing one piece of equipment. We recommend using StarSan for sterilizing all of your equipment. It is a no-rinse sanitizer, which makes it super easy to use. We like to blend 1/2tsp of Starsan with 500ml of water in a spray bottle. Spray everything that is touching your cider with it, shake off the excess foam and you are good to go!
First Step, Selecting Your Cider
- Is it pasteurized or unpasteurized?
- If it is pasteurized, make sure that there has been no Potassium Sorbate added to it. Sorbate prevents fermentation, anything with sorbate in it will NOT ferment. As long as it does not have sorbate in it, the cider is ready to be fermented.
- If it is not pasteurized, the bacteria and wild yeast inside the cider will need to be killed off so that a fresh pitch of proper yeast can be added.
- One brand we recommend for making cider is Allen’s Apple Juice. The apple juice makes excellent cider, is inexpensive, and is available year-round. We tend to pick up the low acid version and squeeze one lime into the fermenter to properly balance everything.
- How to kill it off? We recommend adding ¼ tsp of potassium metabisulphite mixed with 100ml of water to the cider juice and letting it sit for a day.
Second Step, Fermenting the Cider
- Pick a vessel to ferment the cider in. It is important to have at least 15% of the vessel volume be airspace. Fermentation is a violent process and it tends to bubble up quite a bit. Having airspace prevents ‘boil-overs’ and other mishaps.
- Take a hydrometer reading of your cider juice. It should read at least 1.042. for a cider to end up at 5% alcohol it should start at around 1.046. To make a higher gravity reading, add dextrose/honey/brown sugar to bring up the fermentable amount. Be careful not to add too much. Add these things in small amounts and take hydrometer readings until at the desired level.
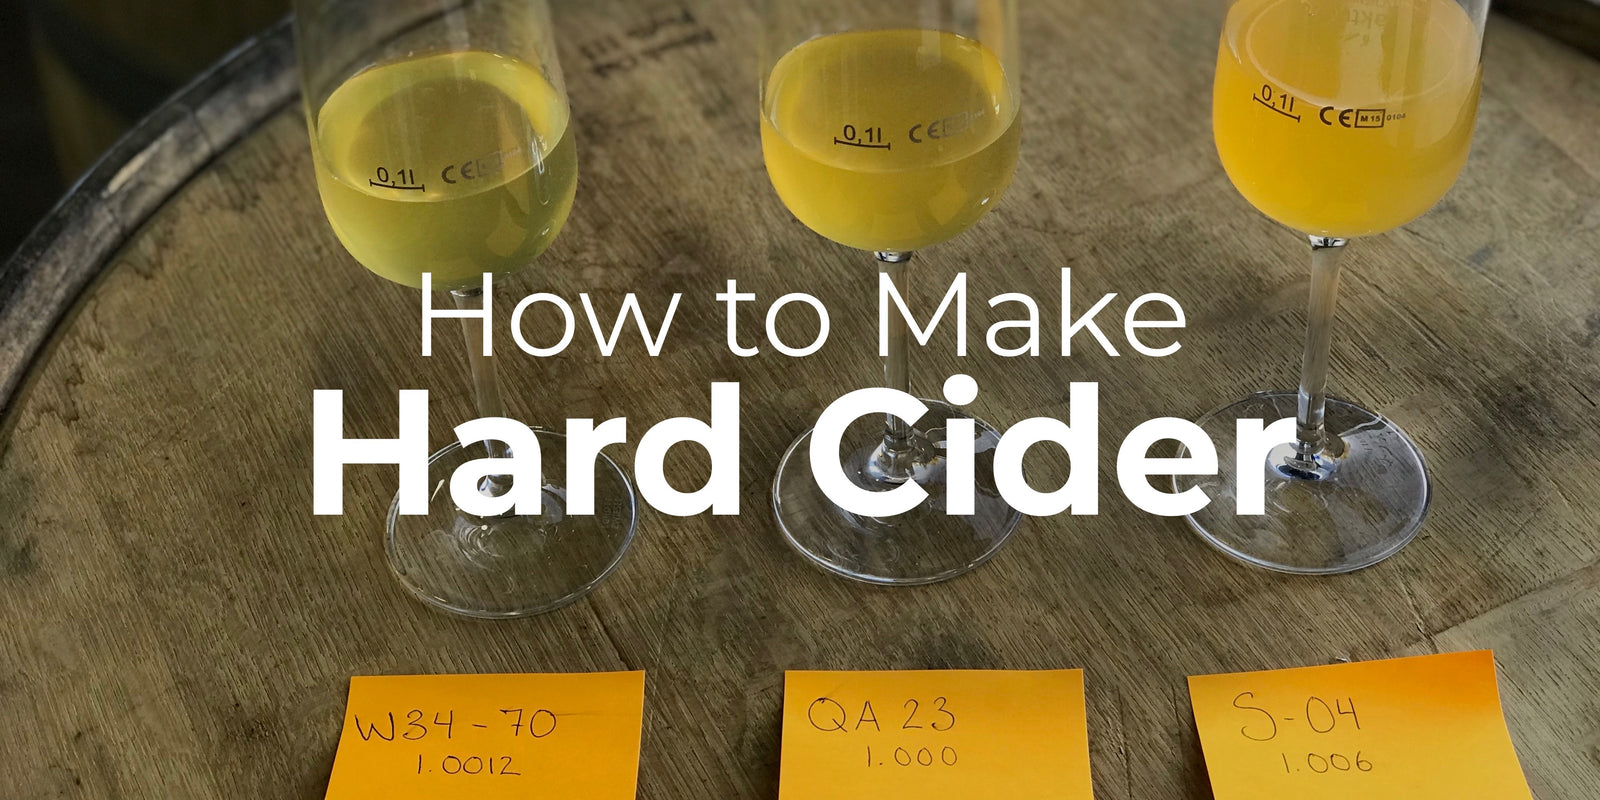
- Next up, add your yeast. We tend to recommend the S-04 English Ale yeast, but Safcider, W34-70, D47, & EC-1118 can all be used to ferment cider with different results.
- Add the yeast to the cider, close the lid or place the bung and airlock and let it sit somewhere that is 19-22°c for a week.
- Add 1 tsp/20L of cider of Pectic Enzyme. This helps break down the pectin in the fruit and will help with clarity going forward.
- It’s best to not interact with the fermentation, be patient and let it do its thing.
- Fermentations tend to start off within a couple of days of adding yeast. Usually the first 3-4 days are full of action with lots of bubbling and things moving. After that the fermentation slows down and almost appears as if it is not working – that is not the case. Generally, it is still working away, just at a slower rate.
- After a week of fermentation, take a hydrometer measurement. It should read around 1.000, if it is not close to that number then let it sit for another 3 days and take another reading. After that, anywhere from 0.996-1.010 will be a sign of a full fermentation. Different yeasts finish at different final gravities.
Third Step, Racking and Aging the Cider
- Once it is fully fermented a choice will need to be made. Will the cider eventually be carbonated or will it remain flat?
- If it is going to be a flat cider, it now needs to be racked and stabilized.
- Transfer it to a new vessel using your siphon, and then mix in metabisulphite to prevent further fermentation and bacterial growth. Adding metabisulphite will prevent carbonation, unless force carbonating with C02.
- How much metabisulphite to add? We recommend adding 1 tsp (diluted with 100ml of water) per 20L of racked cider.
- Make sure there is no airspace in the new vessel. If there is, transfer it to a smaller vessel.
- For a cider that will carbonated, simply rack it into a clean vessel and make sure it is filled up to the top.
- Airspace in the ‘secondary’ or second vessel leads to disaster most of the time. Oxygen will negatively impact and the cider and eventually will ruin it. The best way to avoid this issue is to have their be no airspace in the vessel used after fermentation.
- What we’re trying to accomplish now is to let the Cider age a bit and to clarify.
- Whether the cider will be carbonated or not, now is the time to let it settle and clarify. If possible, move the cider somewhere cold (0-10°c). Colder temperatures help clarify more than anything else. In beermaking this is called ‘cold-crashing’ in winemaking we call it ‘cold stabilization’.
- If it is not possible to put it somewhere cold, place it in the coldest spot available and let it sit for 7-14 days.
- If the cider still remains cloudy, come visit us and pick up some bentonite. Bentonite is a clarification agent that does a great job cleaning up cloudy ciders/meads/wines.
Fourth Step, Bottling Time
- Once the cider has settled out and is clean it can now be bottled. Siphon it into a clean vessel (a pail is a good place for it).
- If you are carbonating, now is the time to add the priming sugar.
- We generally recommend dextrose for this, but DME, Honey, brown sugar, and even table sugar can be used to slightly different results.
- Mix 150g of dextrose in with 200ml of boiling water. Add to the freshly racked cider and gently stir it in. Add more dextrose for more carbonation, we recommend no more than 200g.
- Siphon the cider into your sanitized bottles and close them up. Make sure the bottles are designed to handle carbonation.
- Let them sit for two weeks, put it in the fridge to chill and ENJOY!
- If you are not carbonating the cider, do the above steps but do not add priming sugar. Siphon it into any type of bottle, even wine bottles. Can be consumed right away, but will age over time. If you are planning on letting age for longer than 2 months, we recommend adding ½ of metabisulphite/20L of cider at bottling. This will help keep the cider from spoiling.
- Cider can also be kegged. Simply transfer the cider into a cleaned keg, apply CO2 (typically more than beer.) and serve when fully carbonated.
- For kegging, you have more options on adding flavours to the cider. Occasionally we will add inverted sugar to sweeten the cider up before kegging. This can’t be done for bottle priming, but in kegs it is fine.